
Serving Waitsburg, Dayton and the Touchet Valley
Serving Waitsburg, Dayton and the Touchet Valley
Post-restoration hunt for Eurasian collared doves.
The rusted old H&R about to be restored.
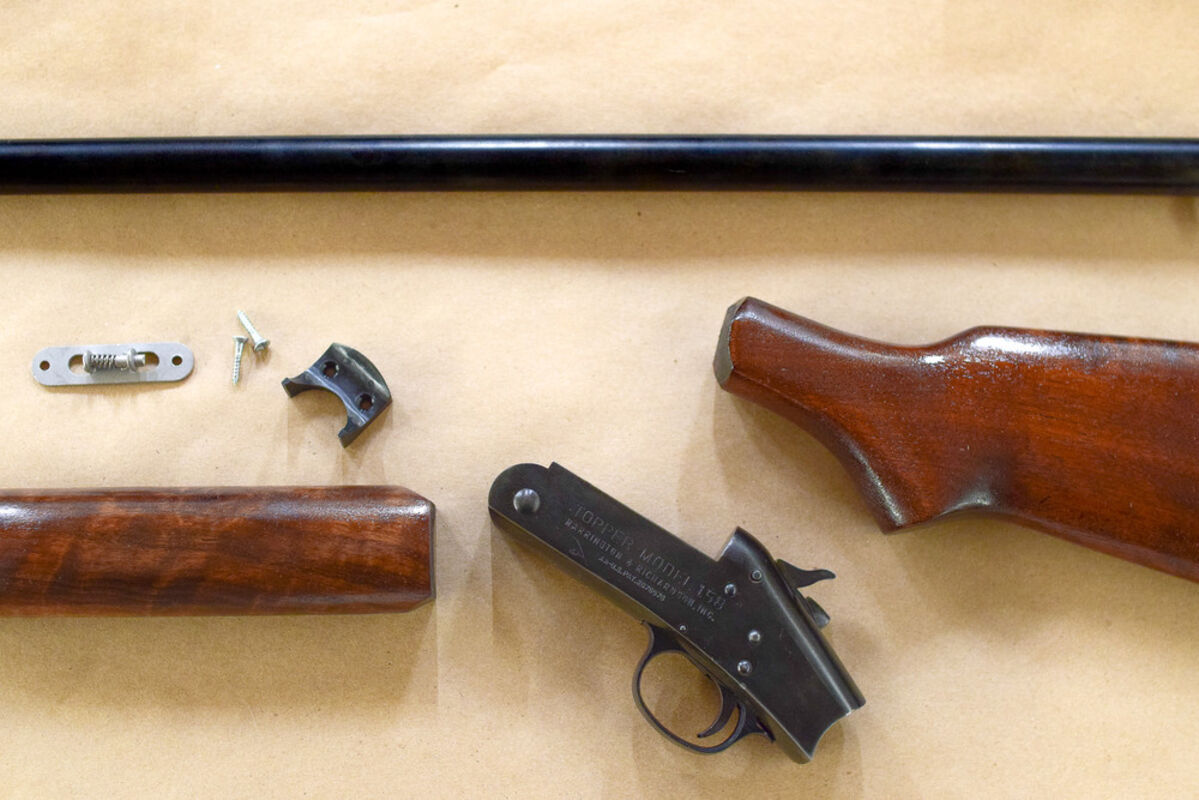
The refinished parts awaiting reassembly.
I don't know when Dad purchased the gun or from whom or where, but one of its few outings captured on film was in 1977. My brother was a toddler and dad had hunted a gray squirrel on his parent's farm in what used to be the middle-of-nowhere Appalachia.
The Herrington and Richardson Topper Model 158 (H&R) was the shotgun built for everyone. An ordinary, functional firearm built for the budget-minded. Overly simplistic yet wholly reliable described the H&R firearms line from 1871 to 1986 under the parent company.
Dad's H&R saw its last hunt somewhere around 1992 when a zealous child acting crafty with a gray squirrel failed to properly lock the action. I secured provisions for Brunswick stew and learned a frightening lesson in the process. The top-break action blew open, ejecting the casing and busting the gun's forearm. Miraculously, I did not suffer the same consequence. As a pre-teen, I had little use for a busted gun or the ability or knowledge to repair it. I left it to rust in an attic for nearly thirty years.
Returning home in 2020, I finally decided to grab the old H&R from the attic and haul it back to Waitsburg. Given their basic style and seemingly low-grade stocks, H&R firearms don't carry much monetary value. Given the gun was useless otherwise, I decided to try my hand at a home restoration job, finding my first experience to be as terrifying as expected.
Ordering a Burchwood Casey complete re-bluing kit, I went to work one afternoon in the shop, thinking the directions were straightforward and simplistic. I learned quickly, however, that our hot, dry summer climate play a major role in the complexity of the endeavor, so much so that I basically enjoyed doing the job twice.
The first crucial step was stripping the rust and bluing from the barrel and action. Using a kit-provided swab and applying the rust and blue removal chemical was easy, as was using steel wool to gently rub off rust and debris. The kerfuffle came when the stripping chemical began drying into a sticky paste on the barrel in the 90-degree heat.
Using the supplied degreaser, I quickly removed the gunk from the barrel, performing a second and third coat of rust and blue remover in some cases, quickly working the steel wool and sand paper to remove everything, then promptly cleaning.
Lesson 1: Perform your firearm restoration in a climate-controlled area.
During the rust/blue removal step, the directions say to clean the metal until it shines, taking great care in the process. Simple enough. The problem occurs where interpretations of "shine" may vary. My cleaning job resulted in what appeared to be a rust-free, lustrous surface, yet later during the bluing step, I learned otherwise.
Lesson 2: Sand and polish the metal at least twice again once you think you have it "shiny" using the rust removal chemical and degreasing thoroughly when finished. You want as near a mirror finish as possible.
Degreasing is another critical step as bluing will not work with unclean metal. Grease and oil prevent the bluing chemical from contacting the metal surface, creating a blotchy appearance. Be sure to use latex or nitrile gloves during the process as fingerprints can show plainly from skin oils. As with the rust and blue removal, once you think the parts are clean, degrease at least twice again, scrubbing diligently. Sanding tough areas when removing rust and bluing can help tremendously, the gun action being the most difficult area.
Sound fun so far? The above steps are simply tedious. Bluing is utter madness. Bluing is a clear chemical that reacts with the steel, darkening it to the rich, almost black finish most guns bear. The directions say to apply quickly, and thoroughly, with an optimal 30 to 45 second soak and no longer than 60 seconds. This could not be stressed enough, which led me to believe the gun would self-destruct at 61 seconds. I decided to blue the H&R barrel in three sections, similar to what the direction recommended.
Lesson 3: Blue the barrel one or two inches at a time. By the time I had the area evenly coated, the starting point had been sitting for 20 seconds, leaving an uneven soak time before washing in cold water and breaking the chemical reaction.
Although it would have been excruciatingly slow, wiping a single blue streak around the barrel at a time would have been far better in the long-run for creating an even finish and would have required about the same amount of time. Thankfully, the finish darkened as it "cured" over 24-hours.
Lesson 4: Coating many small areas is preferable over fewer large areas providing a better finish.
With the metals finally finished, I turned to the stock. The original wood was light and wide-grained with an orangish tint when finished. The replacement forearm was beautiful walnut. How to match them up?
Once sanded clean, I used "special walnut 224" stain from the hardware store for the stock, matching with the new forearm as close as possible. Wiping on two light coats with a rag, I then applied teak oil to both stock and forearm. Finally, a light wipe of clear furniture urethane gave gloss and superior weather protection that looked good to me.
Lesson 5: I am a better carpenter than metalsmith.
Overall, I was pleased with the outcome. The barrel finish could be better and the process simpler, knowing what I know now, but the result was far better than the prior condition. And, I suppose learning a new skill requires starting somewhere.
Regardless, the H&R heirloom found its way back into action, plucking a plump collared dove on its first outing as a reborn small game scattergun. A bird I doubt my dad had ever even heard of.


Reader Comments(0)